Inbox
Add a Label
Tag the contact you're chatting with by adding labels straight from the Inbox.
Labels are tags that organize your contacts - "VIP", "Hot Lead", "Follow Up", and so on. While you're chatting with a customer in the Inbox, you can add or remove their labels without leaving the conversation.
How to Add a Label
- Open the conversation in the Inbox.
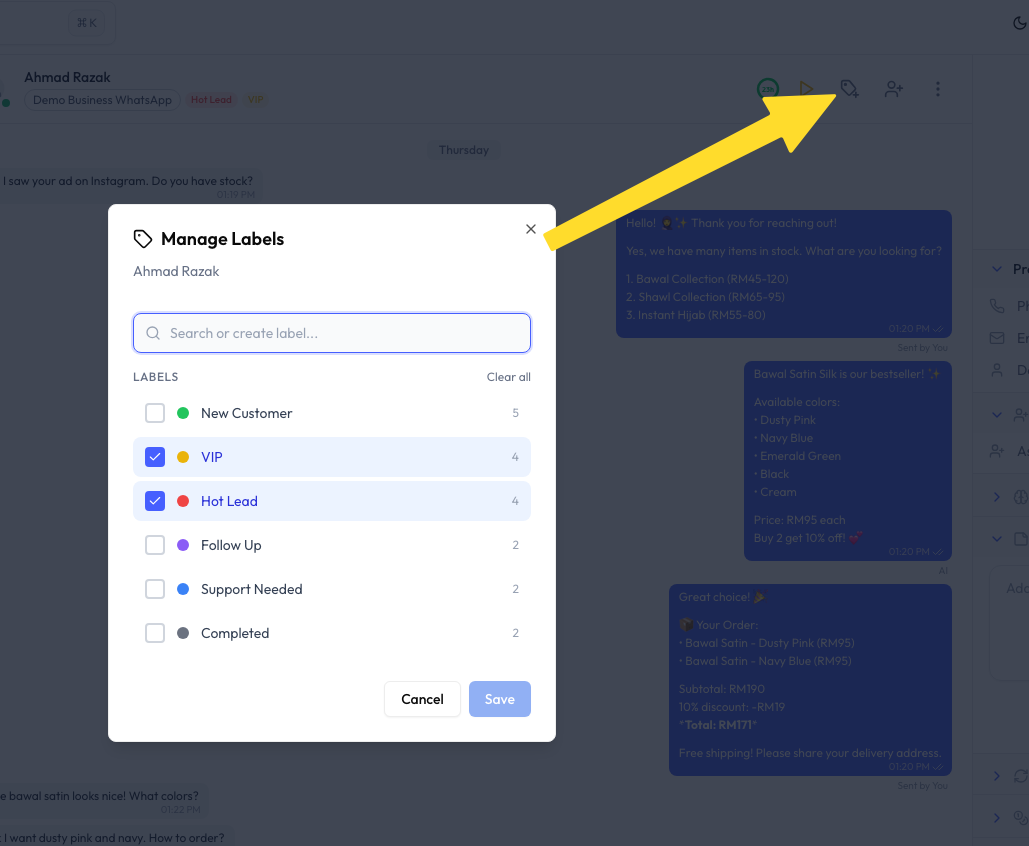
- Click the tag icon in the chat header.
- The Manage Labels modal opens, showing every label.
- Tick the labels you want to apply to this contact.
- Click Save.
The labels you ticked now appear on the contact - both in the conversation list and in the customer details panel.
Creating a Label on the Spot
You don't have to leave the Inbox to make a new label:
- In the Manage Labels modal, type a name into the Search or create label box.
- If no label matches, you'll get the option to create it.
- Create the label, tick it, and click Save.
What the Modal Shows
| Element | What it means |
|---|---|
| Color dot | Each label has a color so you can spot it quickly in the conversation list |
| Number | How many contacts currently have that label |
| Checkbox | Ticked means the label is applied to this contact |
| Clear all | Removes every label from this contact at once |
Common Questions
Yes. Tick as many labels as you need - a contact can be "VIP" and "Hot Lead" at the same time.
The master label list is managed in Contacts. See Manage Labels for creating, editing, and deleting labels.
Yes. With Auto Label, your chatbot can tag contacts automatically based on the conversation. You can still adjust those labels manually from the Inbox.
No. Unticking a label only removes it from this contact. The label still exists and stays on every other contact that has it.